


Let's finish the Todo object. Only a few steps away. Here is what we will focus on in part 3:
CircleCI
CircleCi is a purpose-built CI/CD platform that delivers speed and reliability —
in the cloud or on your private infrastructure.
We can rely on it to run tests and deploy. All we need to do is to configure a workflow/pipeline in a file named config.yml inside a folder called .circleci.
More details can be found in the doc: link
CircleCI Config
We will write the config starting from scratch. Let's open the IDE and start coding.
Version of CircleCI
Inside config.yml , the first line we need is to specify a version of CircleCI we want to use.
From the documentation:
CircleCI cloud and newer server versions should be using CircleCI
2.1.
# CircleCI configuration file

version: 2.1
Jobs
We have to set up some tasks to tell CircleCI what to do.
In this example, there is only one task and I call it install-test . I picked the correct docker with Ruby 3.0.0 . CircleCI will then check out the source code to the configured path and print out the Ruby version on the terminal.
jobs:
    install-test:
        docker:
          - image: cimg/ruby:3.0.0
        steps:
          - checkout
          - run: ruby --version
Of course, we don't want CircleCI to just print out the Ruby version. Here is the list of what I want CircleCI to do:
install
rspecby usinggemcheck the
rspecversionrun the tests
When we turn these steps into codes, they will look like these:
jobs:
    install-test:
        docker:
          - image: cimg/ruby:3.0.0
        steps:
          - checkout
          - run: ruby --version
          - run: gem install rspec
          - run: rspec --version
          - run: rspec
But I don't really like the layout as it looks like a bunch of unorganised steps to me. Luckily, we can name each of them by using name and command tag. Let's transform them into a better layout.
jobs:
  install-test:
    docker:
      - image: cimg/ruby:3.0.0
    steps:
      - checkout
      - run:
          name: Checking Ruby Version
          command: ruby --version
      - run:
          name: Installing RSpec
          command: gem install rspec
      - run:
          name: Checking RSpec Version
          command: rspec --version
      - run:
          name: Running Tests
          command: rspec
Perfect! CircleCI will display the name of each step on the dashboard. It will give us a much clearer picture of the whole process.
Workflows
In the last part, we need to tell CircleCI the order of executing the jobs we defined above.
In our case, we only have one job here so we only need to give a name to the workflow and place our job install-test under it. It's all done.
Imagine there are tons of jobs and you want them to be constructed in several workflows, then this part will be so powerful and handy.
workflows:
  my-workflow:
    jobs:
      - install-test
After configuring config.yml , let's move on to our README.md
README.md
I decided to follow the README.md template from Makers. Here is what they suggested:
# Title of project

Brief description of what the project is

## Getting started

how to start the project

## Usage

how to use the project

## Running tests

how to run
Finally, I added some extra titles under Usage to explain all the steps and each method in detail.
You can check my final README.md here: link
GitHub
Last but not least, we have to commit it to GitHub and then connect CircleCI with the project.
CircleCI will then be triggered to run the tests. The final result should be like this:
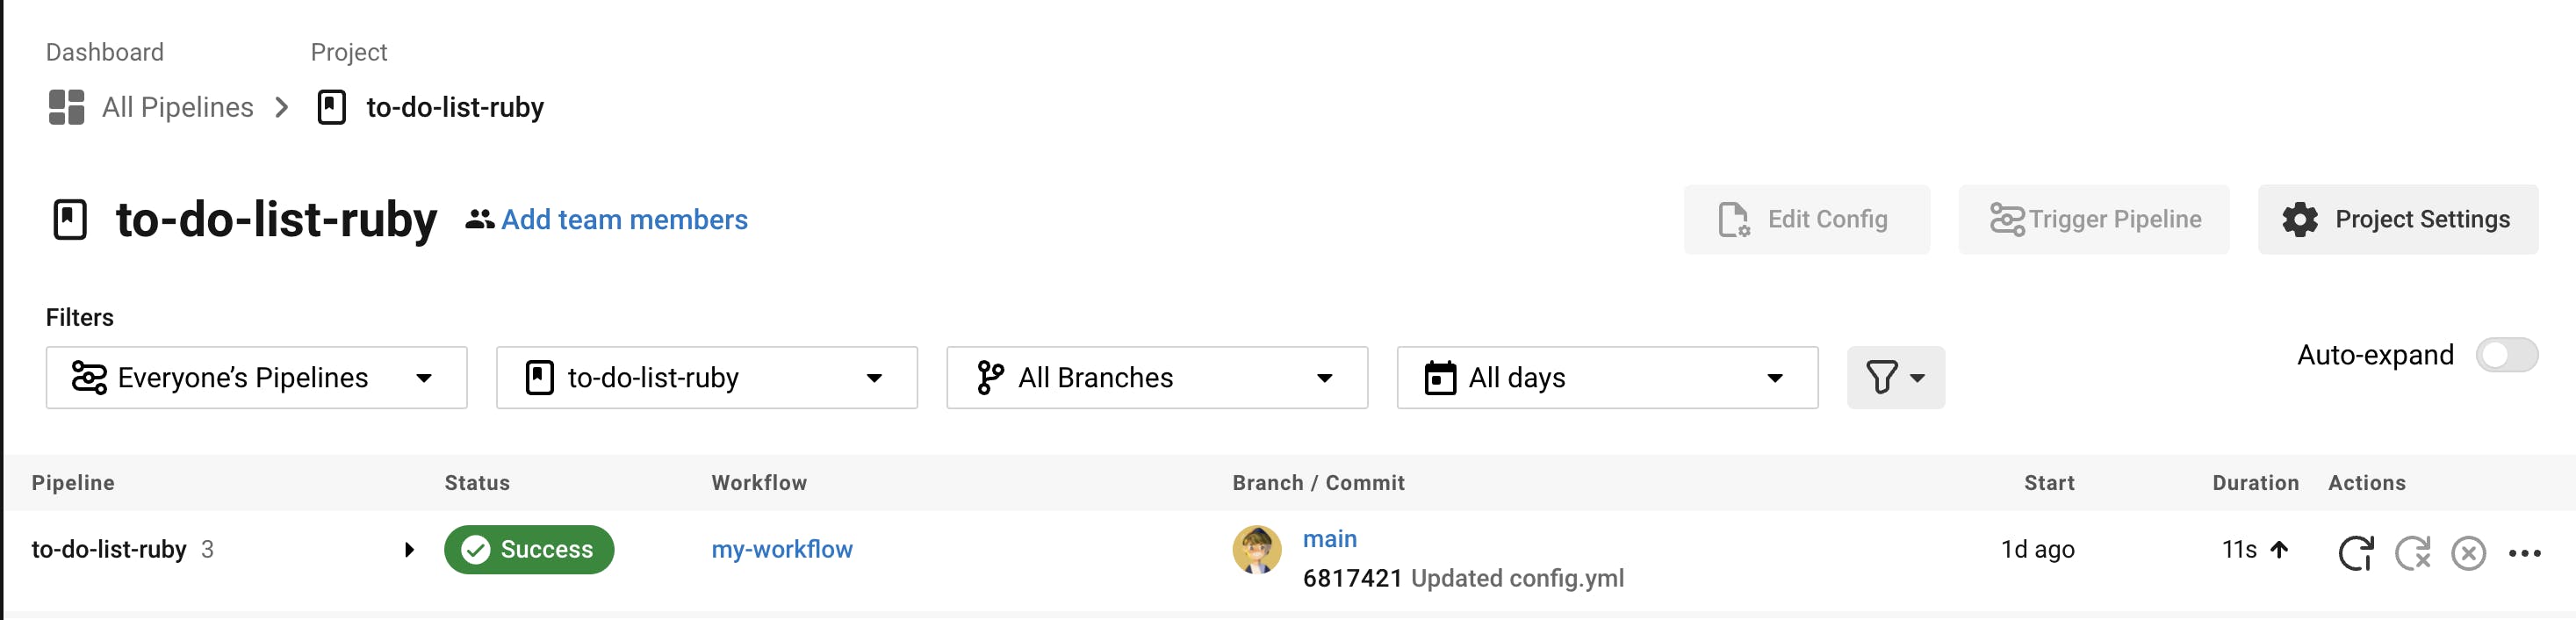

Congratulations! We have finished this mini-project on our own.
Feelings & Challenges
It always feels good when you've come so far and tackled all the problems that occurred during the process.
Tons of Googling is involved in this project. One of the challenges for me is that I have to record each step of the development process and turn them into a readable blog. To be honest, the process is quite tiring. After I've developed the programme for hours, I have to write the blog right away. It might also take me another hour to finish. However, I'm now a confident blogger after all. This process gave me stress but also reward.
I hope in the near future, I could launch another mini-project to challenge myself. It's only the start of my developer journey. Thank you for watching this series. Hope you enjoy it!